15 Common Defects of Metal Bending Services
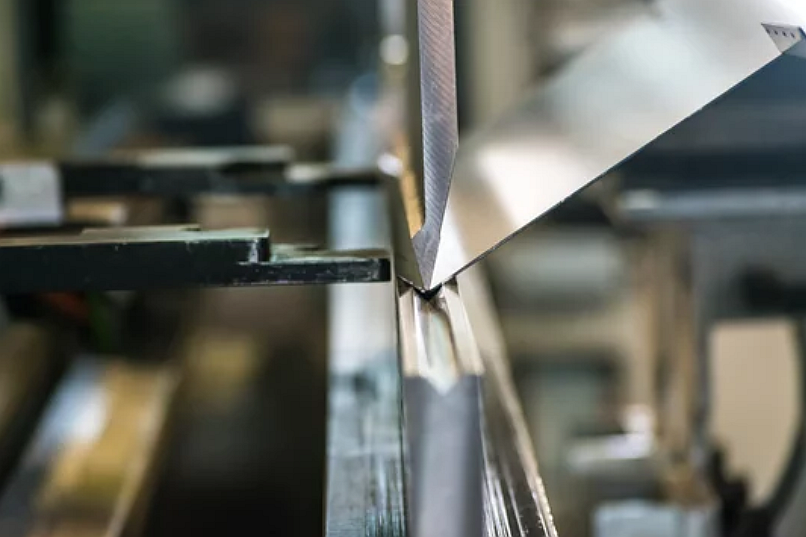
Metal bending is a complex fabrication process with many variables that can lead to defects if improperly controlled. When working with metal bending services, being aware of potential flaws in the finished product and their causes is essential for achieving quality results. Common bending defects, their appearance, causes, prevention, and remedies are detailed below.

Wavy Edges
Wavy or rippled edges on the outer bend radius indicate inconsistent bending. This results from improper punch and die clearance, worn or chipped tooling, or trying to bend with too large of a radius. It can be prevented using proper tooling tolerances and radii for the material thickness. Wavy edges can only be remedied by re-bending or scrapping the part.
Twisting
The finished bend has an undesired twist along the bend axis. The punch causes it and the die's non-parallel alignment or the grain direction in the metal sheet. It can be prevented by realigning the tools or changing grain direction. Severe twisting requires re-bending or part rejection.
Flat Spots
Flat spots appear intermittently along the inside bend radius, giving it a flat-faceted look. It happens when sliding friction between the punch and the sheet causes localized stretching as other areas compress. Lubricating the interface can prevent this. Flat spots cannot be corrected after bending.
Overbending
The bent angle exceeds the programmed angle due to improper tool penetration. It is caused by worn or undersized punch and die sets. It can be prevented by replacing tooling and verifying penetration depths. Slight overbending may be corrected by reverse bending to the proper angle.
Under bending
The bend angle is less than specified, caused by improper tool penetration, worn tools, or inadequate tonnage. It can be avoided by setting the correct penetration depth and ensuring adequate force. Minor under-bending may be adjusted by re-bending to the target angle.
Springback
The bent angle relaxes slightly after removal from the press brake due to elastic recovery forces in the metal. It is influenced by material type, hardness, and bend radius. It can be accounted for by overbending to the expected spring back angle. Significant spring back requires re-bending.
Scratches
Noticeable abrasion or scratch marks on the metal surface. This results from hard particles on the tools or improper lubrication. It can be prevented by keeping tools clean and applying correct lubrication. Minor scratches can be removed by grinding or sanding but may impact appearance or corrosion resistance.
Gouging
DeepIndentations Deep indentations are localized damage to the metal surface caused by worn, chipped, or misaligned tooling. Prevent this by inspecting and aligning tools. Refurbish or replace damaged tooling. Gouges reduce the part's strength, so rejection may be required if severe.
Cracking
Cracks along the bend line or radius result from exceeding the material's flexibility during bending. It happens from using too small of a bend radius or an incorrect tool setup. Properly sized punch and die sets must be used to prevent cracking. Cracked parts must be scrapped.
Thinning
A thinner material section along the inside bend radius becomes visible as ripples or waves. It is caused by stretching strain from incorrect tooling or tight bend radii. Verify proper tool selection and radii for the material. Thinning weakens the part, which may lead to rejection.
Thickening
Outward bumps occur along the outer bend surface. It results from compressive forces wrinkling and folding the material. Increased tonnage capability is needed, along with larger bend radii. Thickened sections must usually be ground smooth, or the part rejected.
Tool Marks
Indentations or raised ridges occur in the surface due to improper tooling contact and penetration. Check for damaged, worn, or misaligned toolsets. Tool marks reduce aesthetics and may impact performance. Minor marks can be removed through grinding, sanding, or finishing.
Inconsistent Bends
Variability in bend angles and radii at different locations on the part. This results from worn or chipped tooling, inconsistent lubrication, or operator error. Strict process control and inspection are required to prevent this. Parts with inconsistent bends often must be scrapped.
Burrs
Rough raised edges or rolls of excess metal along the bend line. Dull cutting tools, poor alignment, or clearances between the top and bottom tools cause these. Deburring processes are required to remove them if unable to refine the tooling setup.
Part Fracture
The metal cracks or breaks completely during bending. A clear indicator of improper tool selection, incorrect bend radii, or inadequate tonnage capability for the metal thickness and strength. Ensure specifications are within equipment limitations. Fractures produce scrap parts.
In summary, a controlled process, dimensional inspection, and adapted machining are critical to minimizing bending defects. Upfront communication of all technical requirements and specifications allows metal bending services to select proper tooling and processes to avoid these potential fabrication flaws.


